
How To Create A Mood Board Using Microsoft Word
Are you a visual person like me? Do you need to see everything together to get a good sense if patterns and colors will come together in a beautiful symphony or clash horribly? Trust me, I’m the exact same way.
I don’t possess that superpower where I can just imagine something and have it magically come to life. And that’s why I use mood boards or design boards or inspiration boards (whichever you prefer to call them).

There are probably a billion (well maybe a hundred, let’s be a little more realistic) ways you can put together a design board using a plethora of different platforms, but this is the quickest and easiest way I make mine using Microsoft Word and screenshots.
Step 1: Create a new Word document
Open a new, blank document and change the orientation to landscape. I’m not sure why, but a design board just seems to flow better in landscape for me - just a personal preference.
On my super old Mac from the good ole college days, and probably outdated Word, you change the orientation by clicking the third tab “Layout“ and then selecting “landscape“ in the first dropdown.

Step 2: Screenshot all your favorite things
Here’s the fun part! Search online for all your favorite pieces whether that’s furniture, decorations, curtains, rugs, paint colors, etc.
Once you find something you love, screenshot the image (images with white backgrounds tend to work best). If you’re on a Mac you can use the shortcut Shift + Command + 4 to use the screenshot tool. If you’re on a PC, search for the Snipping Tool.
Pro tip: If you cannot see the full image on your screen change the browser size by holding down Command/Control and then pressing the minus sign (-).
I like to start my search by finding all the pieces I currently have in my home. If you cannot find them online, simply snap a picture with your phone and upload it to your computer.

Step 3: Add your images to your document
I like to save all my screenshots to my desktop. Mostly because Mac’s automatically put screenshots there but also because they are super easy to see and find.
Once you have a ton of images saved, either drag and drop or insert them into your Word document.
Step 4: Make all the images fit on one page
Okay, I said finding the images was the fun part but this is also a super fun part… Now you get to see how everything comes together.

Start off by right clicking on your image. Under “Wrap Text“ select “None“. Your image will probably jump off the page after you do this, simply scroll up and find it again. But now you can move it freely around the page. You can also change the scale and overlap by bringing some images in front of larger ones.
I like to keep my big furniture pieces larger on the page since I know they will take up more visual space in the room.
Step 5: Create as many designs as your heart desires
Once I know which pieces are definitely staying in the room, I create a few different designs by changing up a couple of different items. For example, you could swap out different rugs, different art pieces, or even different paint/wallpapers.
In the images below, I swapped out the rugs and artwork to really change the color pallet.

Design 1: Neutral color scheme using all items I already own. (Free)
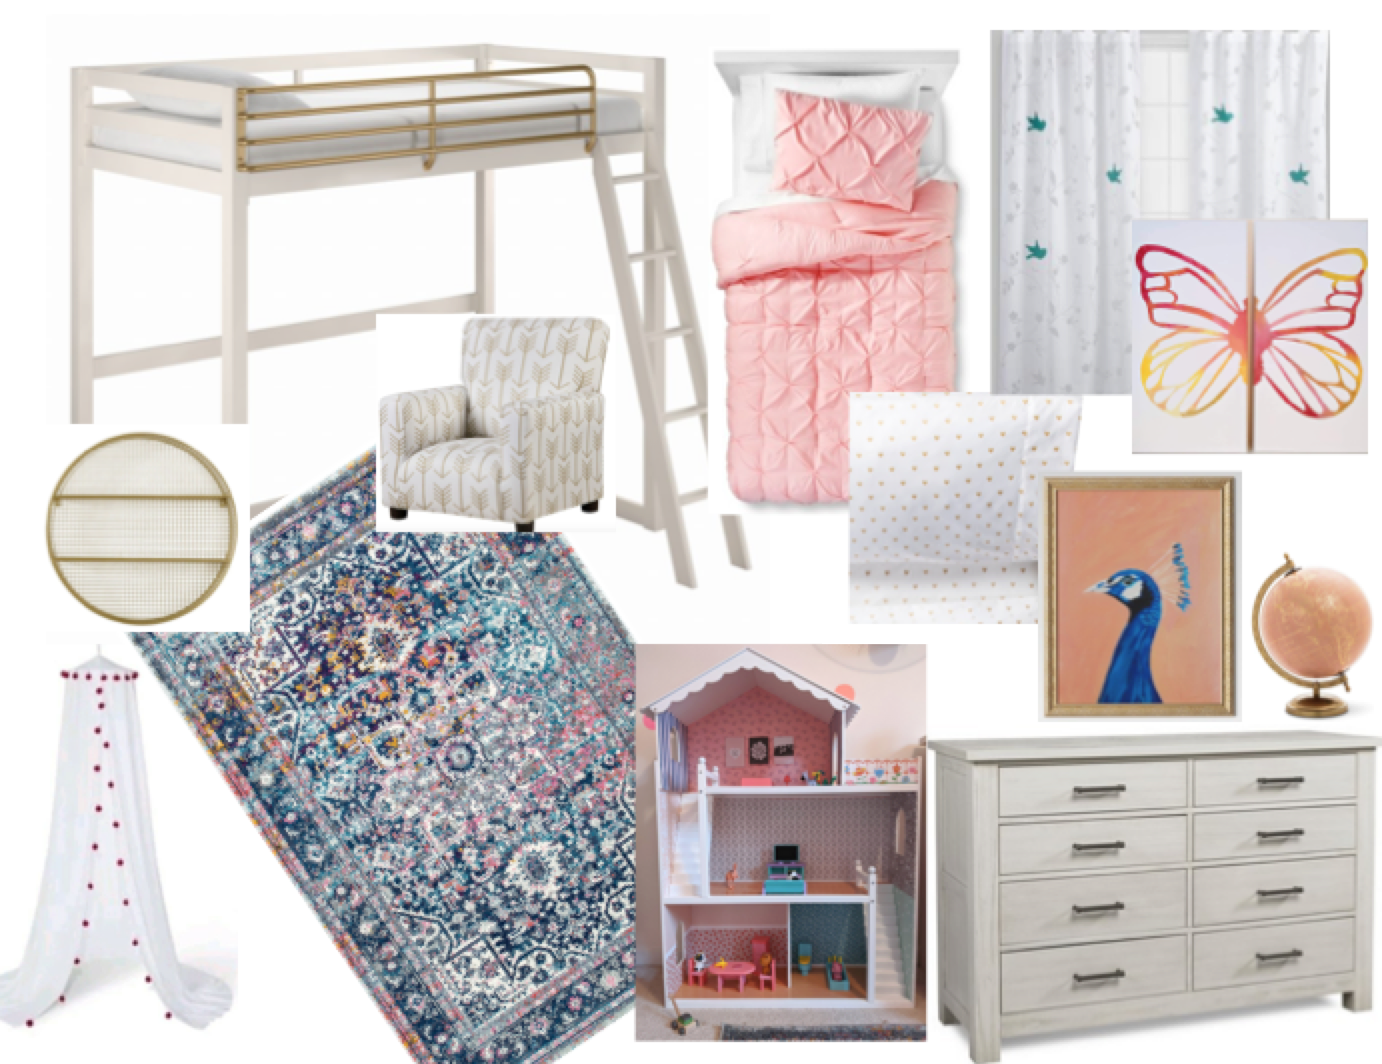
Design 2: Pink and blue color scheme with a new, peacock art print. ($45)

Design 3: Colorful room with a new gallery wall and expensive rug. (For this design, I threw the budget out the window and focused on items I absolutely adore!)
Pro tip: I like to create three different price points in my designs. For example, I might create one board using only things I already have which would make it completely free. Then I’ll make a copy of that board and swap out a few items like budget friendly rug or some inexpensive artwork. And for my last design, I’ll add in my dream pieces regardless of price (like that ADORABLE triangle rug from Crate and Kids that I have had my eye on since my daughter was born. Seriously, that’s how long I have wanted it).